|
You are about to learn how I make a knife sheath.
I know there are might be better ways to make this same sheath, and I also know that there are other sheath designs that are likely better too.
However I like this design that I show being made here. I like the way this sheath design allows for one-handed drawing of the knife, and replacement of it without looking at the blade.
I don't use snaps in this design, and there is a very good reason why this is. Snaps fool us into thinking that they are good at keeping a knife safely in its sheath. But what actually occurs is that snaps take so much time to use, that we tend to not place the knife back in the sheath when we should. That is why knives get lost too, not from falling out of their sheaths, but by being left out some place when snapping and un-snapping becomes too much of a hassle.
Making a leather sheath is easy!
But working out on paper all the design elements is not so easy. But it is far better to make mistakes on paper where you can erase, than it is to correct a design flaw in leather.
I have tried to show very clear photos of how I make my knife sheaths, along with text for each photo explaining exactly how to do each step. By following along with directions you should be able to complete this same sheath design for yourself in an afternoon.
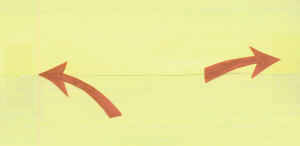
| lower Photo is of 2 sheets of paper being taped |
|
| Tape joint along sides |
I tape two sheets of a yellow (wide line) legal pad paper together making one long sheet. Carefully line up the red margin lines of both of the sheets when you tape the papers. Place two pieces of tape off to the sides so that you can draw on the paper center areas without hitting the tape. Later when you are ready to cut out the design pattern , you can place tape all along the joint.
When you are done with this step you should have the joined paper with the red margins at the left hand side,We will call this red margin line the "R line", also try to line up the spacing of the lines on the two papers when you tape them, so that everything appears as if it were a very long single sheet of yellow legal paper.
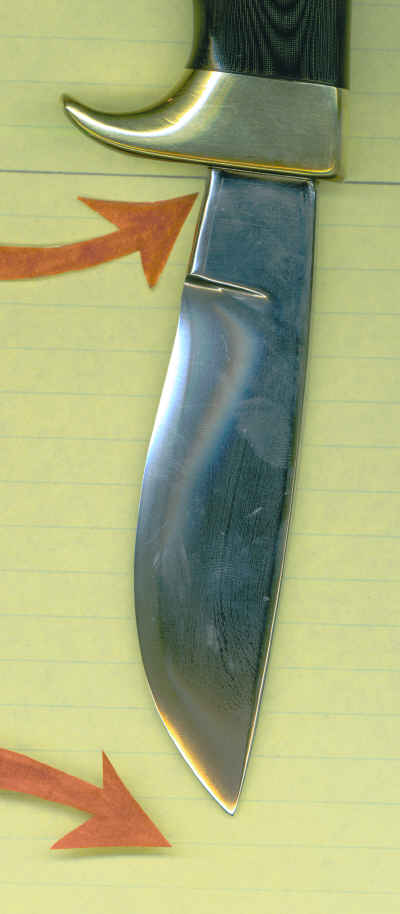
Lay the knife on the paper, near the bottom, but not too far down because you will need to draw lines below it yet.
Place the knife down with the blade facing to the left and your red margin lines.
(This is to make the sheath for a person who is right handed, if you are left handed, you will have to reverse all the directions)
Line up the guard so that the bottom of the guard appears directly over one on the lines of the paper.
It don't really matter more or less what line you pick, just find a place that seems to fit your knife well.
Note the line that ran under the bottom of the guard, then trace over that line boldly going all the way across the paper. We will call this line that runs under the guard the "G line". This first line will serve you as a reference point.
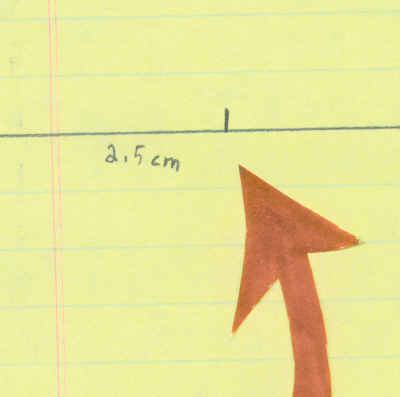
Now you have to start marking measurements, and because I have gotten requests from all over the world about the construction of my Knife sheaths, I have listed the measurements here using the "Metric" system. All measurements are in centimeters. (Example " 8 cm" = eight centimeters)
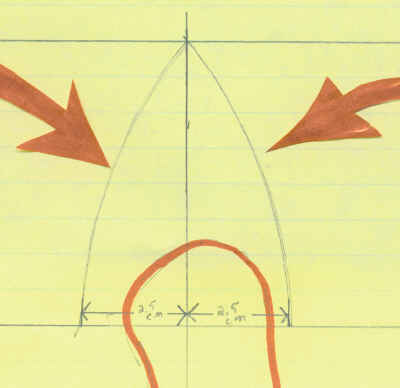
You now need to place a mark exactly 2.5 cm from the "R Line" along your line you just drew.

Place the knife blade on top of the paper again, this time carefully line up the bottom of the guard with the G line you drew.
Place the end of the guard at the 2.5 cm mark. You now will trace with a pencil all around you knife.
After that, try to trace around the lines again with a different color pen so that you don't get confused later. (I used red in the photos)
Once you have a nice, good outline of your knife in the correct position, place the knife off to the side for now. 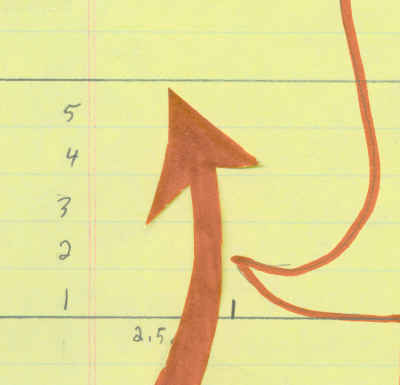
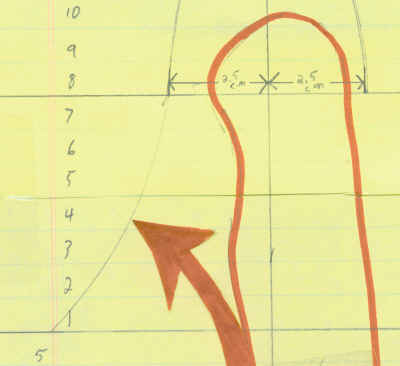
Starting at the reference line, count up 5 spaces, (actually write on each line the number of that space), trace over the line that is on top of your number 5 spaces as shown.
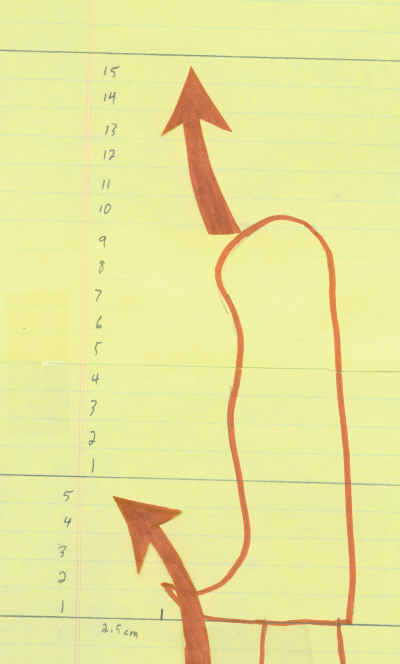
You now count up an additional 15 spaces and then trace over the line that is above that 15th space as shown.
The knife sheath you see being made in the photos here is the one I like to make, but I have altered this pattern from time to time in this area.
This traced line over the 15th space, indicates the length of the belt loop. Sometimes I make a longer loop by counting to 17 or even up to 19-22 spaces and then drawing the line there.
After you make your first sheath you should know where to draw the top line at.
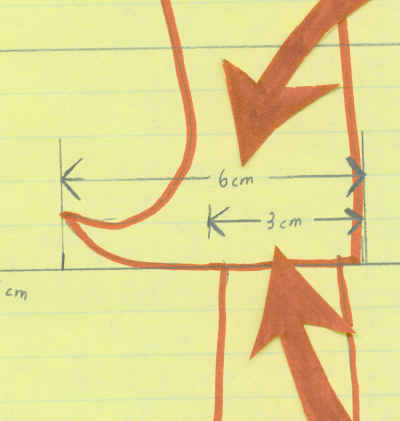
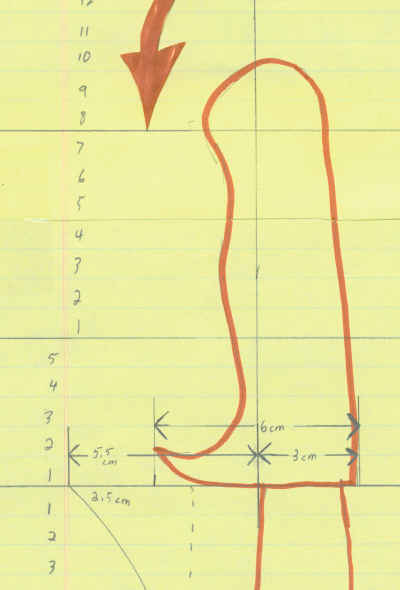
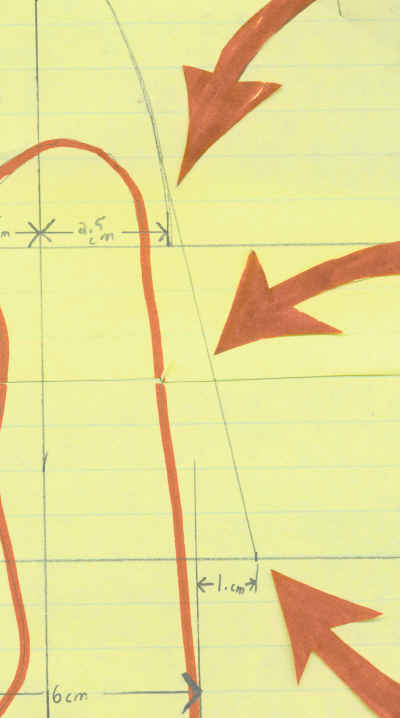
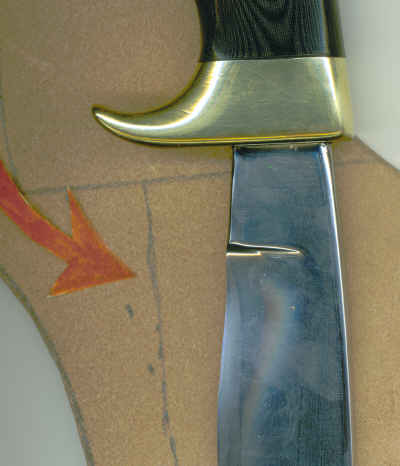
On most knives, the guard area is the widest part of the knife that will be sticking into the sheath., You will have to now measure the guard to find the center of it. Notice in the photo that my guard measures out to be 6 cm wide. Once you know how wide is the guard, it should be easy to divide that number in half and measure this to find the center of your guard and mark that position.
Now you need to measure from the red margin line (the R line), all the way over to the mark you made showing the position of the middle of the guard. Take this measurement and transfer it a few times so that you can draw a vertical line that runs the same distance away from the "R" line, all the way up and down your paper...(This is why you needed to make sure you had the red lines lined up when you taped it earlier)
Remember this line you draw is only showing the middle of the guard, and does not have to fall in the middle of the blade as all. (See next photo...) We will call this line that now runs up the middle of the guard the "M " line.
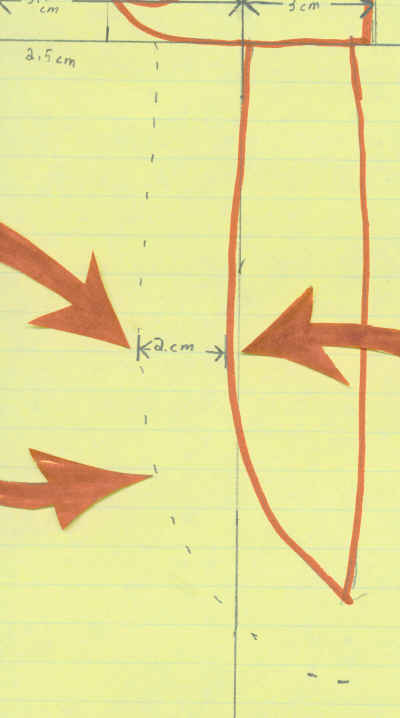
Using your ruler, carefully measure and mark a run of dots 2 cm from the cutting area of the blade.
Start at the bottom point and continue all the way up to the "G line"
(the reference line you drew already.)
Are we haveing fun yet?
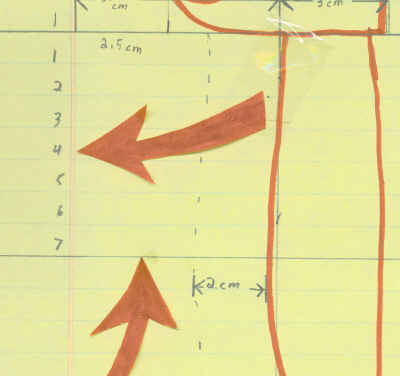
Starting at your guard reference line,
count down 7 spaces,
and trace over the line that is below that 7th space.
(see photo example)
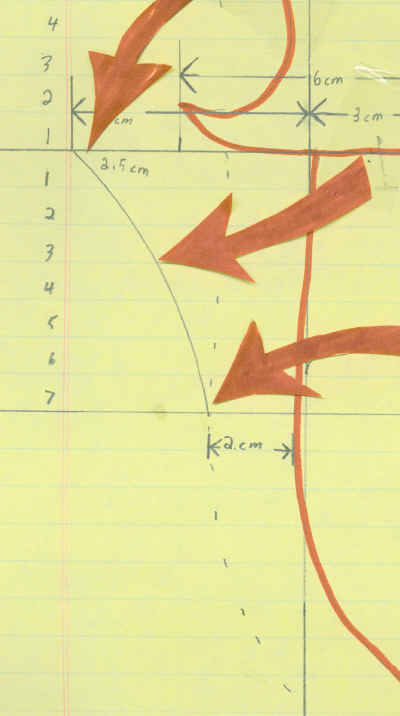
Okay, here is the tricky part.... you will need to make a curve, and although there are many drafting tools sold to help you do this, most of the time I cant find them when I need them However I get around my lack of proper tools by improvising with things around the house. The curve will be made in this case with a smaller dinner plate.
The curve starts at the intersection of your guard reference line (the "G" line)and red margin line (The "R" line),
And goes to the intersection between your dotted line and the lower 7 cm line as shown.
Don't get too upset if you don't know what size dinner plate to use to make the ark of the curve, I just use whatever is on hand anyway, the key thing to remember is that your curve where it meets the lower 7 space line must be almost pointed down so that it seems to almost flow into the dotted line naturally.
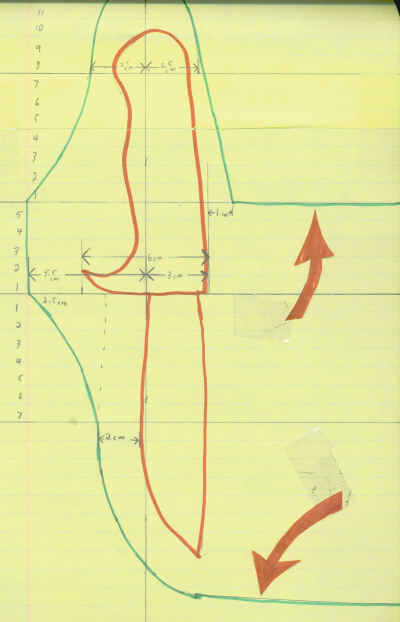
You are now going to make the point on the belt loop.
Start counting at the line that marks the upper 5th space. Count up 7 spaces and trace over the line above that 7th space. This is why it helps to write down the numbers in each space as you count them, so that finding your position is easy.
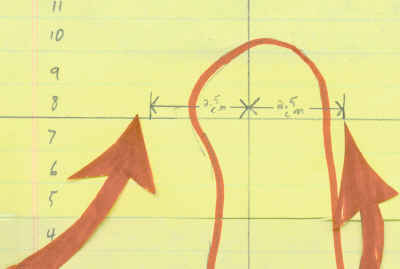
You are now going to mark the width of the belt loop point.
Starting at the intersection of the upper 7th space line you just drew, and the line you drew to mark the center of the guard,(the "M" line) we measure over along the 7th line, exactly 2.5 cm on either side of the central guard line...Confirm your measurements with the photo
Using that same dinner plate we used before, draw two arcing lines as shown.
Turn the plate in such a way as to allow you to reverse the arc. This arc is only drawn on the left side of our design only!!!
The right side is different and we will get to that in a moment. The arc starts out at the upper 5th line / red margin line intersection, and goes up to meet the other ark we just drew coming down from the point.
Now, the best thing about the design of this sheath is that it allows for knives of different sizes.
We only have to make our alterations to the design along one side of the pattern. The left side of the pattern is always about the same, but this right side (due to the way the leather will be folded over to meet the left side) will need to be adjusted to fit the individual knife...But don't panic, I have taken steps to allow you to do this without having to do much of any improvising, (in other words, my sheath design allows for a lack of artistic talent and still be able to work for you)
You first need to find the spot of your guard or blade (any part of the knife that will be hidden inside the sheath) that sticks out to the right the most. Draw a line somewhere along the upper 5th line at the place where your guard sticks out to the right the most (as you see I have done in the photo). Now just measure over from this intersection (the upper 5th space line and the line you marked to show how far to the right your guard might be) measure over exactly 1 cm and mark that position along the upper 5th space line.
Now use a ruler and draw a (more or less), straight line from this 1 cm mark up to a place in the upper curve that seems natural and flows....
The reason I cant tell you how to do this closer is that each knife I make is different, and so the need to draw lines that seem to flow and look natural in this area of the belt loop.
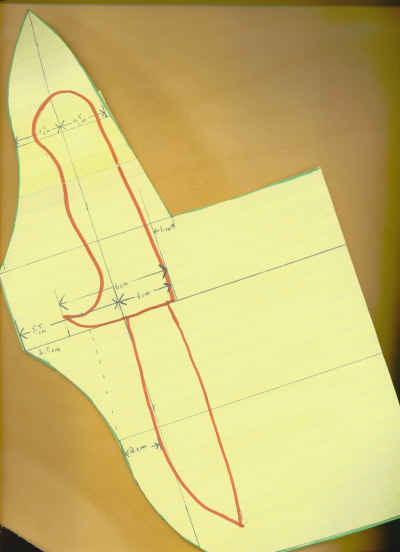
Believe it or not, you are DONE! (Well, done with the hardest part anyway)
All you need to do to finish this pattern for your sheath is to trace over the outline of the pattern. Notice that at the lower end on the pattern, the dotted line that starts at the very lower point, I just go to whatever line on the legal paper that is below that one, and trace over it to the end of the paper. Also note that you will just use the left over upper 5th line where we left off, to be the pattern border.
The reason your pattern looks great on the left side, and so odd on the right is that you will fold over the right side of the pattern over the knife, and as each knife is a different size, we cant tell right now what the final border will look like on the right hand side of the pattern.
I like to outline the border of my pattern to make sure I know what lines are parts of the pattern and what are not. Cut out the pattern.
Time to get the leather...I like to use 9 - 12 oz leather.
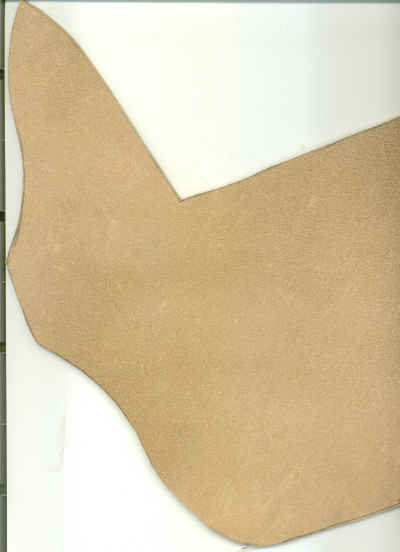
Turn the leather so that the smooth side is down and the rough side is up.
Lay this cutout pattern on top of the leather, make sure you have extra leather on the right hand side just incase. Trace with a pencil around the pattern.
Use a sharp tool, and cut the leather pattern out.
You now will make the gusset.
This strip of leather will protect the stitches from the sharp knife blade.
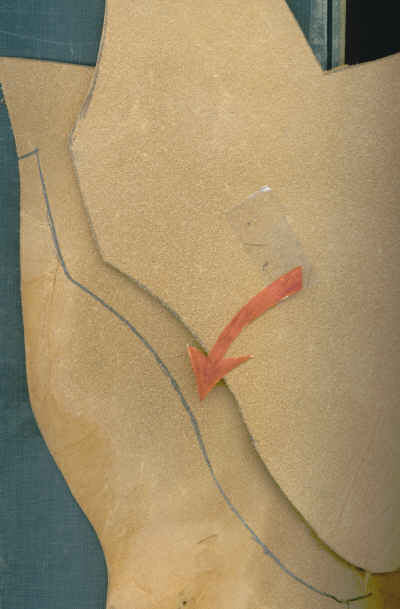
Place your leather sheath on top of some extra leather.
Trace along the left hand side of the pattern so that you have a copy of what the left side of the sheath looks like.
In the photo you can see how I have traced the outline of the sheath onto the other leather underneath.
Cut along the traced line.

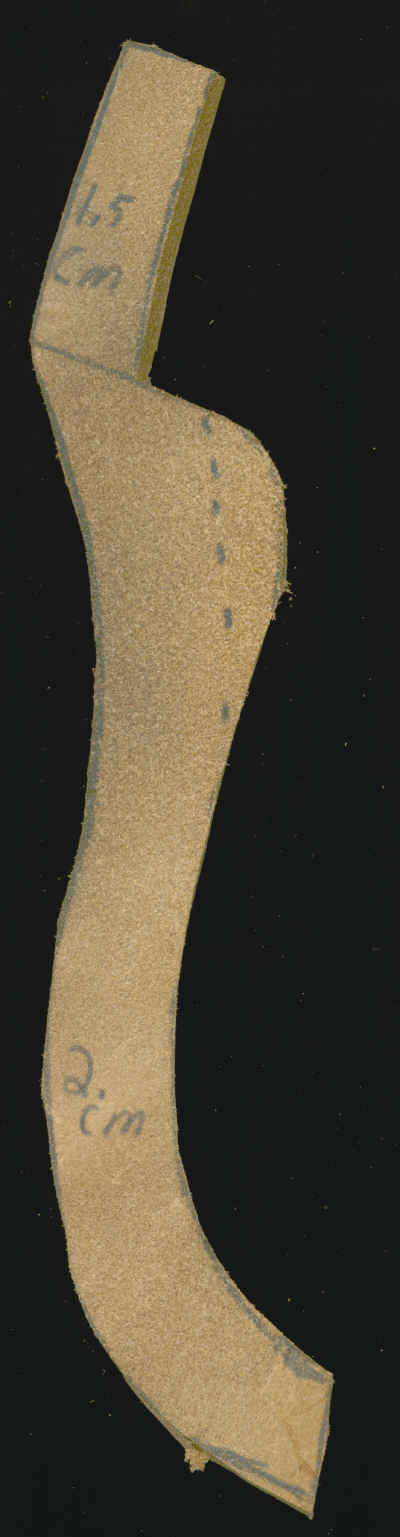
Now by using the paper pattern as a guide, find the place where you can mark the line that was used to mark the bottom of the guard of the knife. Transfer this guard line onto the leather as shown...now also measure over above this a strip that is 1.5 cm wide and draw the line there
Measure over below the guard line, a strip that is 2 cm wide.
Also use the paper pattern to find the bottom end of the pattern and mark that at the lower end of the 2 cm strip as shown...
Do the same for the top, (the top will be in this case, the upper 5cm line on the paper pattern)
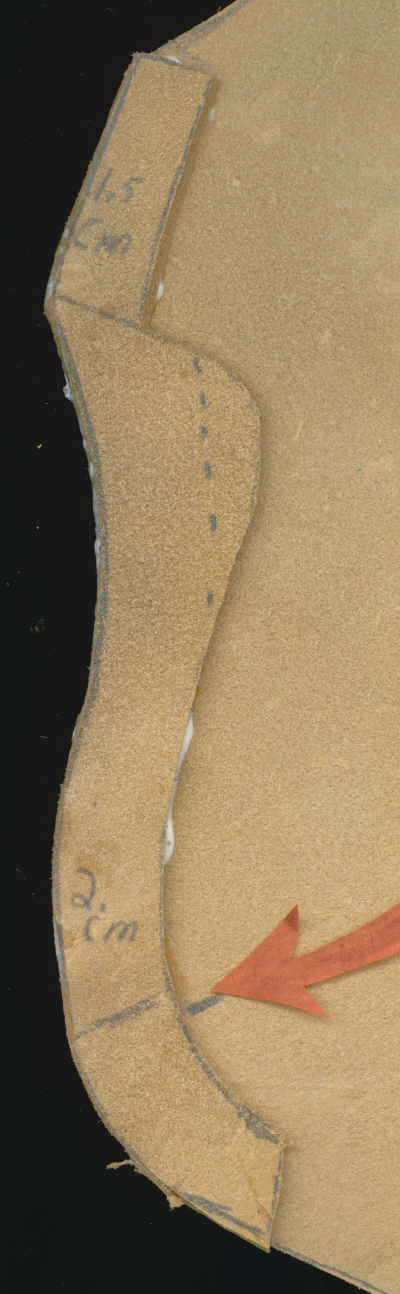
Now place the knife on top of the leather we are working on now. Line things up so that the blade is in the correct position. What we are seeking in this step is to draw a little shelf of the leather for the sticking-out part of the guard to sit on. The next photo shows you how this will look.
Cut out the gusset...
This will be glued to the matching left hand side of the leather sheath.
Notice the little extra leather left in the area where the guard of the knife will be?
This extra leather forms a shelf and will allow the knife to "hang" in the sheath and not rub on the leather inside the sheath.
The gusset will also protect the stitches from being cut of the shap knife blade.
I can't count the number of times I have cut sheaths with my knife because I did not make a gusset.
The gusset will also allow me to "Slam" my knife back into the sheath without popping out the lower end of the sheath.
Use leather Glue to attach the gusset on top of the matching left hand side of the sheath.
Do not apply any Leather Glue along the lower section (about 5 cm long) as you will need to separate this section of the gusset later when stitching-up the sheath.
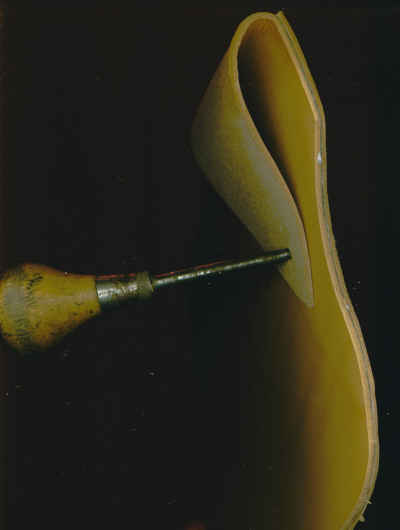
Appy some water at the upper section of the leather sheath (on the paper pattern we would be talking about the upper 5th space line) and bend the leather over to make the belt loop. Remember we bend the leather so that the rough side of the leather of the belt loop is on the outside.
Using a awl, you need to poke a hold thought both layers of leather for the first rivet.
The next photo should help you find the correct position, but each sheath is slightly different, so go with what feels natural.
I use the copper rivets that are sold to use with leather, however I also know that regular pop rivets will work. I use 3 rivets to hold the belt loop in place.
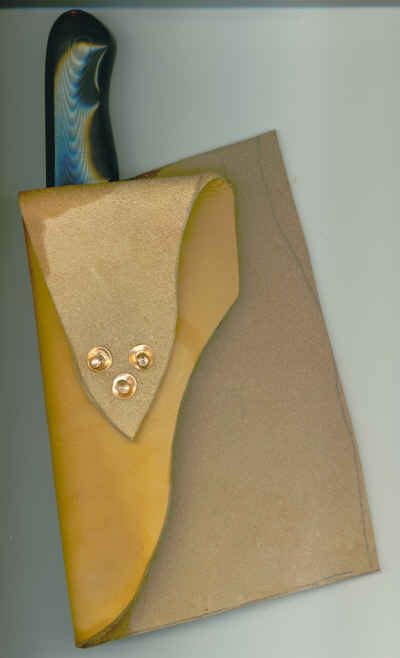
Now you need to wet down the section of the sheath that will be folded .
Don't use too much water!
(infact some knife makers will use something called "New Leather" to make the fold soft)
Place the knife into its position where it will sit,
and fold the leather over it to make a pouch.
Using your fingers, (your "Clean" fingers), work the folded leather around until you have a good fit around the knife.
Keep moving things around until everything seems in the correct position.
Then trace the cut side of the sheath ( the side with the attached gusset), onto the un-cut side.
(Remember, it is very important to keep your fingers clean when working with wet/unportected leather.
Also, keep your fingernails from cutting into the soft leather too as a mark made now on the leather will always show.
Now you will be using this traced line to show you where to apply the Leather Glue.
Run a bead on both section of leather to be glued, and glue them together.
Place the sheath under a pile of books for a while so to allow the sheath to glue up in the correct position.
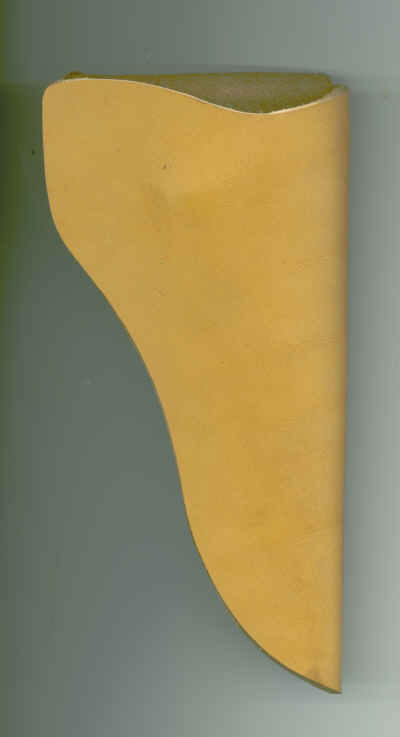
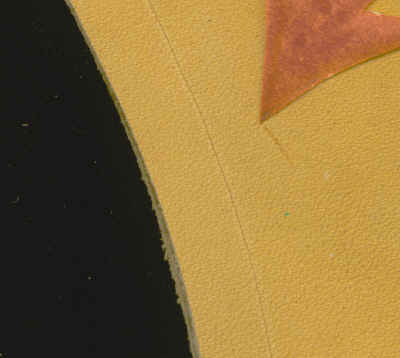
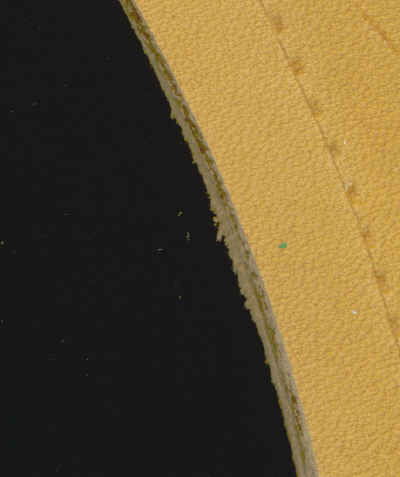
Once the leather Glue has had a chance to dry cut away the extra sections of un-needed leather and sand the sheath edges on a belt sander to shape.
Notice how I have cut the leather at the mouth of the sheath to allow the knife to enter the sheath with ease.
You now are going to mark the position of all the holes you will drill for the stitching.
You will need to scribe a line in the soft leather with something sharp, yet also able to keep a constant distance of 1cm form the other edge.
I have a tool I got from a leather store to do this, it adjusts to allow me to scribe a line at whatever distance away from the other edge I seek...But a way to get by on the cheap is to go into the kitchen and grab a fork. By bending back one of the inner tings of a fork you can make a darn good leather scribe.
Any way you do it, you need a scribed line, one cm away from the outer edge of the sheath where the two sides of the folded leather meet. You need to plan where you want the stitching to start and stop, and only scribe a line in that section, because any line you scribe into leather will be permanent.
You may wish to get a little wheel that has bumps on it, to make the spaced marks for stitching holes. I have one and it works great. I just roll it on top of the scratched line and it make depressions that show me where to drill my holes.
On the other hand, if you don't have a little wheel thingy, just use a kitchen fork to make a bunch of little dots along the scratched line.
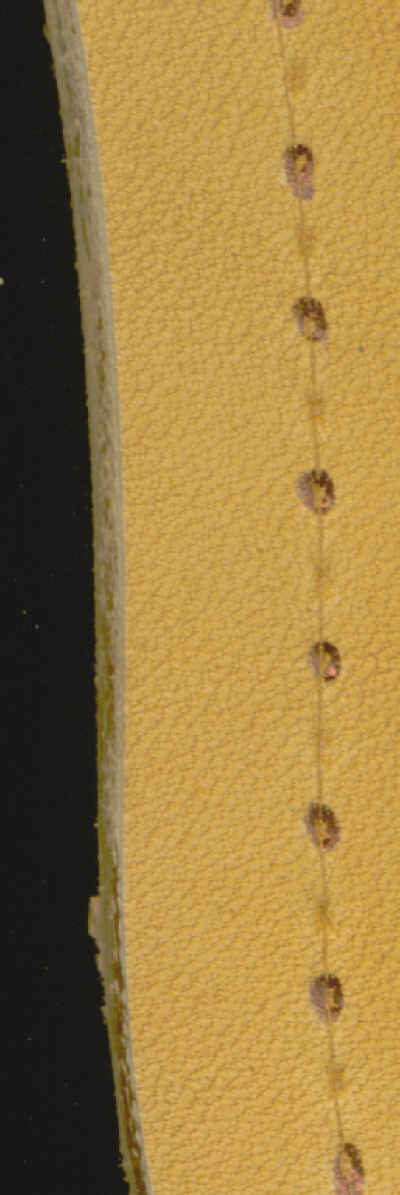
When you use the wheel thingy, you only drill a hole at every-other mark. Im sure the same is true if you use a fork to find the correct spacing of the holes.
I make every-other hold with a pen mark so I can tell where to drill the hole and where to skip.

I will drill the first hole (at the lower end of the sheath)with a smaller drill bit than the rest of the holes.
This is because the first hole will not have as much stitches in it as the others.
I try to keep my drill holes in the leather evenly spaced.
I drill the holes on my drill press with a block of wood under the sheath to support it during drilling.
Time to stitch the sheath...(To learn how I stitch my knife sheaths, go up to the top of this webpage and find the listing on the left hand side for that page)
I hope my photos and text have allowed you understand how I make the sheath for my knives.
As I said at the start of the webpage, I know that other knife makers may well use other/better ways to make their knife sheaths. But I like my way as shown here because it allows me to make the sheath over and over the same way, and yet still allow me to change the size of the sheath to fit different sized knives.
The key thing I have shown here is the use of a paper pattern that is created for each knife. This use of a pattern is important because it will allow me to work out any problems before I ever pick up the leather. I have seen too many young knife makers end up with sheaths that did not fit the knife because they tried to just lay the knife down on the leather and trace around it. A paper pattern give you a chance to notice problem areas and work around them.
The reason I started out with the pattern on that yellow paper is that such paper is sold all over the world, and the lines on the paper form good starting places .
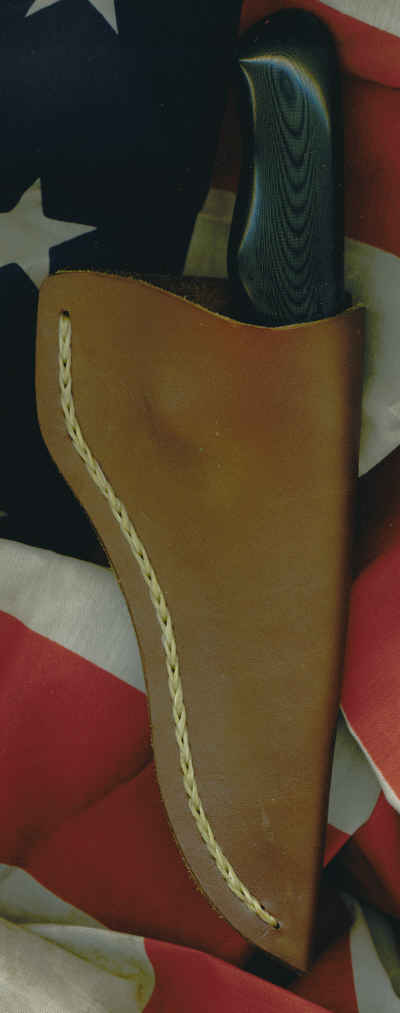
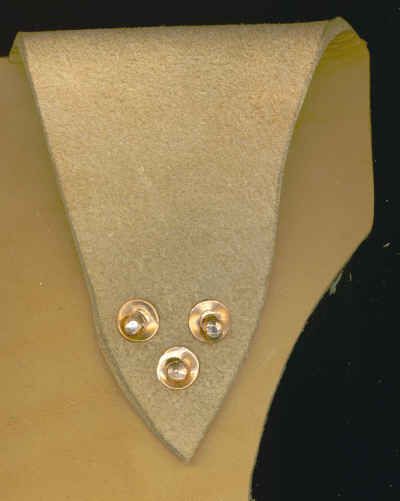
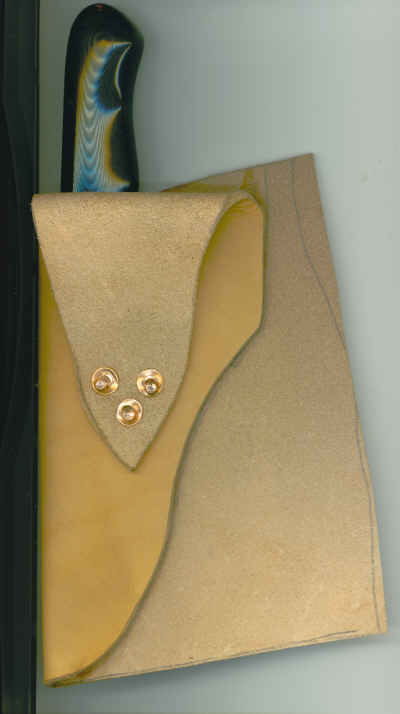
| Finished sheath with knife |
|
|
| for more information - daqotah@hotmail.com |
|